

Eso Easy Money Low Level
- Login
- Home
- New
- Sorcerer DPS Parse
- New World 2H Axe / 2H Hammer Build
- Havocrel Bosses Spawn Location
- Mundus Stones
- ESO Deadlands DLC – Builds, Guides and Content Update
- Deathloop Outfits
- Deathloop Feats
- Companion Rapport
- ESO Classes
- CompanionsESO Companions System Welcome to the Companions System Overview Page. The Companions System main focus is to allow solo players and small groups to take on overland and dungeon content without having to worry to be overwhelmed by the enemy forces. You can also find more additional details on the ESO-Hub.com Companion Overview Page. With the launch of the ESO Companion System there will be two companions that you can get as a player, they are called Bastion and Mary. Bastion Companion Guide & Build Mary Companion Guide & Build Companion System Guide ZOS mentioned in an interview that the companion Bastion is like a chivalrous Knight kind of personality. He was the son of a noble but there was a bit of a strife with his history. Bastion ended up becoming a servant to another noble family and now has to protect the rich idiot. According to ZOS the second companion Mary is a Dunmer thief with a "stab you in the back" personality. The questline will cover all of the details regarding the companions Bastion and Mary, once you finish the questline you will unlock Bastion and Mary as a companion. Will there be more ESO companions? Yes,…
- Companion Rapport
- Companions Guide
- Bastian Companion Guide
- Bastian Companion Build
- Mirri Companion Guide
- Mirri Companion Build
- Blackwood Chapter
- Havocrel Bosses Spawn Location
- ESO Deadlands DLC – Builds, Guides and Content Update
- Red Petal Bastion Dungeon Guide
- Dread Cellar Dungeon Guide
- Antiquities & Leads
- Oblivion Portals
- Blackwood Sets
- Blackwood Furniture
- Ability Bar Timers
- Companions
- Blackwood Tapestry Guide
- Rockgrove Trial Guide
- Champion Points 2.0
- Black Drake Villa Dungeo Guide
- The Cauldron Dungeon Guide
- Builds
- PvE Builds – Dungeon & Trial
- Necromancer
- Magicka Necro [Curse]
- Magicka Healer [Scourge]
- Stamina Damage Dealer [Reaper]
- Bow/Bow Damage Dealer [Blight]
- 2H/Bow Damage Dealer [Cleave]
- Health Tank [Colossus]
- Werewolf Build [Claws]
- Dragonknight
- Magicka Damage Dealer [Valakas]
- Magicka Healer [Obsidian]
- Stamina Damage Dealer [Venom]
- 2H/Bow Damage Dealer [Serpent]
- Bow/Bow Damage Dealer [Toxin]
- Health Tank [Catalyst]
- Werewolf Build [Claws]
- Sorcerer
- Magicka Damage Dealer [Mystic]
- Magicka Healer [Surge]
- Stamina Damage Dealer [Windwalker]
- 2H/Bow Damage Dealer [Deathstroke]
- Health Tank [Capacitor]
- Werewolf Build [Claws]
- Pet Sorcerer Heavy Attack Build [Summoner]
- Nightblade
- Magicka Damage Dealer [Azure]
- Magicka Healer [Illusion]
- Stamina Damage Dealer [Rampage]
- Bow/Bow Damage Dealer [Focus]
- Health Tank [Siphoner]
- Werewolf Build [Claws]
- Warden
- Magicka Damage Dealer [Ice & Fire]
- Magicka Healer [Blossom]
- Stamina Damage Dealer [Guardian]
- 2H/Bow Damage Dealer [Predator]
- Bow/Bow Damage Dealer [Racer]
- Health Tank [Frostbite]
- Werewolf Build [Claws]
- Templar
- Magicka Damage Dealer [Beamplar]
- Magicka Healer [Reliever]
- Stamina Damage Dealer [Jabsmania]
- 2H/Bow Damage Dealer [Warrior]
- Health Tank [Paladin]
- Werewolf Build [Claws]
- Necromancer
- PvE Builds – Solo Content
- How To Solo Guide
- Magicka
- Solo Magicka Sorcerer
- Solo Magicka Necromancer
- Solo Magicka Templar
- Solo Magicka Nightblade
- Solo Magicka Dragonknight
- Solo Magicka Warden
- Stamina
- Solo Stamina Sorcerer
- Solo Stamina Necromancer
- Solo Stamina Templar
- Solo Stamina Nightblade
- Solo Stamina Dragonknight
- Solo Stamina Warden
- Special
- Vampire Necromancer Build
- Vampire Nightblade Build
- 1 Bar Pet Magicka Sorcerer
- Werewolf Build – All Classes
- Sword & Shield Stam DK
- Gold Farming Build [Speedy G]
- Grind Builds
- Magicka Grind Build All Classes
- Stamina Grind Build All Classes
- Vateshran Hollows Builds
- Vateshran Hollow Builds
- PvE Endgame Sets
- Stamina DPS Sets
- Magicka DPS Sets
- Tank Sets
- Healer Sets
- Beginner Builds
- 160CP Builds – All Classes
- PvP Builds – Solo Cyrodiil & BG
- Dragonknight
- Stamina Damage Dealer [Legion]
- Magicka Burst Build [Flamebreaker]
- Nightblade
- Stamina Bow Gank [Silencium]
- Stamina Damage Dealer [Assassin]
- Magicka Damage Dealer [Leech]
- Magicka Bomber Build [Bomb]
- Sorcerer
- Magicka Damage Dealer [Streak]
- Stamina Werewolf [Rage]
- Stamina Damage Dealer [Creeve]
- Templar
- Magicka Damage Dealer [Blazeplar]
- Stamina Damage Dealer [Abyss]
- Warden
- Magicka Damage Dealer [Frostcloak]
- Stamina Damage Dealer [Assault]
- Necromancer
- Magicka Damage Dealer [Horror]
- Stamina Damage Dealer [Bloodrush]
- Dragonknight
- PvP Builds – Cyrodiil Group
- Cyrodiil Group PvP Guide
- Magicka Sorcerer Support [Spellbinder]
- Magicka Sorcerer [Elementalist]
- Magicka Templar Healer [Lightbringer]
- Stamina Warden [WarMachine]
- Magicka Necromancer [Smasher]
- Magicka Dragonknight Support [Firelord]
- PvP Builds by Fengrush
- Stamina Necromancer [Bonecrusher]
- Stamina Sorcerer [Ride the Lightning]
- Templar Healer [Guardplar]
- Stamina Warden [Hammer of Justice]
- Hybrid Warden [The Shepherd]
- PvE Builds – Dungeon & Trial
- Beginner
- New Player Beginner Guide
- How to SOLO Guide
- Necromancer
- Magicka Necromancer Beginner Guide
- Magicka Necromancer Beginner Build 160CP
- Stamina Necromancer Beginner Guide
- Stamina Necromancer Beginner Build 160CP
- Dragonknight
- Magicka Dragonknight Beginner Guide
- Magicka Dragonknight Beginner Build 160CP
- Stamina Dragonknight Beginner Guide
- Stamina Dragonknight Beginner Build 160CP
- Sorcerer
- Magicka Sorcerer Beginner Guide
- Magicka Sorcerer Beginner Build 160CP
- Stamina Sorcerer Beginner Guide
- Stamina Sorcerer Beginner Build 160CP
- Nightblade
- Magicka Nightblade Beginner Guide
- Magicka Nightblade Beginner Build 160CP
- Stamina Nightblade Beginner Guide
- Stamina Nightblade Beginner Build 160CP
- Templar
- Magicka Templar Beginner Guide
- Magicka Templar Beginner Build 160CP
- Stamina Templar Beginner Guide
- Stamina Templar Beginner Build 160CP
- Warden
- Magicka Warden Beginner Guide
- Magicka Warden Beginner Build 160CP
- Stamina Warden Beginner Guide
- Stamina Warden Beginner Build 160CP
- Damage Dealer Beginner Guide
- Healer Beginner Guide
- Tanking Beginner Guide
- Race Guide
- Weaving Beginner Guide [Anim. Canceling]
- Dolmen Farming Guide
- Champion Points Beginner Guide
- A Skyhards Beginner Guide
- Morphing Guide
- Weapon and Armor Sets Beginner Guide
- Trait Beginner Guide
- Undaunted Beginner Guide
- Mundus Stones
- PvP Guides
- Cyrodiil Beginner Guide
- Battlegrounds Beginner Guide
- Imperial City Guide
- ESO Plus™ Guide-What to expect?
- Beginners Guide to S'rendarr
- Top 3 Beginner Tips
- Antiquities
- Full Antiquities List with Locations of Leads
- Dwarven Ebon Wolf Mount Item Location List
- Antiquity Grind Guide
- Antiquities Guide for Beginners
- Mythic Item Location List
- Grinding & Leveling
- Magicka Grind Build All Classes
- Stamina Grind Build All Classes
- EXP & Champion Grind Guide
- Psijic Order Leveling Guide
- Antiquities Grind Guide
- Dolmen Grinding – Easy EXP
- Guides 1 – Roles
- Race Guide – Racial Passives
- Vampire Guide
- Werewolf Guide
- Damage Dealer Beginner Guide
- Healer Beginner Guide
- Beginner Tanking Guide
- Advanced Tanking Guide
- ESO Classes
- Guides 2 – General
- Ability Bar Timers
- Status Effects & Mechanics
- Increase Performance in ESO
- Unlock FPS Cap
- Alcast's My Addon List
- Achievement Guides
- Blackwood Tapestry Guide
- Dwarven Ebon Wolf Mount Location
- Instrumental Triumph Achiev. Guide
- Pieces of History Achievement Guide
- Mural Mender Achievement Guide
- Monster Trophies Achievement Guide
- Relics of Summerset Achievement Guide
- Litany of Blood Achievement Guide
- Ancestral Tombs Hunter Achievement Guide
- Sets
- Tank Sets
- Healer Sets
- Magicka DPS Sets
- Stamina DPS Sets
- New Moon Acolyte Set
- Trial-Arena-Dungeon
- Trial Guides
- Rockgrove Trial Guide
- Kyne's Aegis Trial Guide
- Sunspire Trial Guide
- Cloudrest Guide
- Asylum Sanctorium Guide
- Halls of Fabrication Guide
- Maw of Lorkhaj Guide
- Sanctum Ophidia Guide
- Hel Ra Citadel Guide
- Aetherian Archive Guide
- Dungeon Guides
- DLC Dungeon
- Stone Garden Guide
- Castle Thorn Guide
- Icereach Guide
- Unhallowed Grave Guide
- Lair of Maarselok Guide
- Moongrave Fane Guide
- Frostvault Guide
- March of Sacrifices Guide
- Depths of Malatar Guide
- Scalecaller Peak Guide
- Fang Lair Guide
- Bloodroot Forge Guide
- Base Game Dungeon
- White Gold Tower Guide
- Imperial City Prison Guide
- City of Ash II Guide
- Tempest Island Guide
- Spindleclutch I Guide
- Spindleclutch II Guide
- DLC Dungeon
- Vateshran Hollows Arena
- Vateshran Hollows Arena Guide
- Beginner 1 Bar Magicka Sorcerer
- Blackrose Prison Arena
- Blackrose Prison Guide
- Maelstrom Arena
- Maelstrom Arena Veteran Guide
- Beginner 1 Bar Magicka Sorcerer
- Beginner Easy Werewolf Build
- Maelstrom Arena Gameplay
- Dragonstar Arena
- Dragonstar Arena Guide
- Trial Guides
- Crafting
- Antiquities System
- Full Antiquities Location List
- Antiquities Grind Guide
- Easy Fast Gold Farming Build
- Easy Gold Farming Guide
- Crafting Writs Guide
- Jewelry Crafting Guide
- Jewelry Crafting Leveling Guide
- Alchemy Guide
- Provisioning Guide
- Enchanting Guide
- Glyph List
- Blacksmithing Guide
- Clothing Guide
- Woodworking Guide
- Transmutation System Guide
- Fishing Guide
- Fashion
- Skins Showcase
- Polymorph Showcase
- Sets with Visual Special Effects
- Outfits
- Mage Outfits
- Knight Outfits
- Barbaric Outfits
- Skeleton Polymorph Guide
- Cadaverous Assassin Polymorph Guide
- Other
- AlcastHQ.com App
- Alcast PC Specs
- My Addon List
- Unlock FPS Cap Guide
- Increase Performance In ESO
- Champion Points Calculator
- Elder Scrolls Online Webstories
- Other Games
- Deathloop Feats
- Deathloop Outfits
- New World
- 2H Axe / 2H Hammer Build
- Corsair Virtuoso RGB Wireless
- Archive
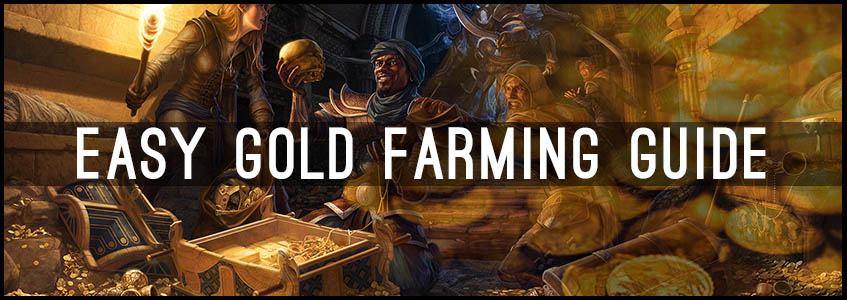
Easy Gold Farming Guide for ESO – How to make Gold
Welcome to the ESO Gold Farming Guide. This gold farming guide shows an easy way to make gold in ESO. You can make around 60-100k gold per hour with this method. You farm materials which you can directly sell or refine to extract gold materials. These materials can then be sold on the open market to make easy money in ESO.
The nice thing about this gold farming method is, that you don't require any experience to clear hard content, as you just farm materials in the overland zone.
Please also keep in mind that prices are different on each server, so the amount you earn can differentiate a lot.
Table of Contents
- The Perfect Build to farm
- The Location
- What are the requirements?
- Addons
The Perfect Build to Farm Gold in ESO

The "Speedy G." Farming Build is optimized for this method. The build has unlimited resources, runs at the maximum speed possible and also lets you stay in stealth permanently. That is nice because you can simply run past all the monsters without them attacking you. That speeds up the gold farming in ESO a lot.
The Location for Gold Farming in ESO (Non-DLC)
Everyone can access the zone Craglorn. Remember, every zone works with this method, I am just showcasing you my recommended zone. The reason why I have chosen Craglorn is because the zone also drops Nirncrux trait material which can be worth quite a lot. But like I said, there is a lot of zones where you can farm materials, find the best zone or spot for you and memorize it. I also showcase a few gold farming routes here on the map that result in very high materials farmed per hour.

What are the requirements?
Theoretically there are none, this is an easy method. However, if you have a more optimized build like mentioned above, then you will of course farm more materials per hour which will result in more gold. You don't need to have perfect legendary gear, it is just important that you have the right gear sets like listed in the build to optimize the gold farming output.
Crafting Perks
Having maximum crafting perks will give you access to the highest tier materials when you harvest a resource node, that is also very important. However, if you don't have that yet you can also farm lower tier materials or chests.
Addons for Gold Farming
There is various addons that you can use to improve your experience with this method.
- Master Merchant: You can use Master Merchant to check the current average selling prices.
- Votan's Mini Map: This helps finding your way through the zone, as it puts a mini map on your screen that you can configure.
- Harvest Map: Shows you where materials are and can also produce 3D farming nodes.
Test Gold Farming Method for ESO
I have done a full showcase and test of this method during a live stream on my twitch channel. You can watch the full test here on youtube.
Related Content
- All Crafting Guides
- Alcast Addon List
Make sure to share this with your friends.

Eso Easy Money Low Level
Source: https://alcasthq.com/easy-gold-farming-guide-for-eso/
Posted by: evansforeplarks.blogspot.com
0 Response to "Eso Easy Money Low Level"
Post a Comment